Your First AI Agent with Xpress AI
This is the second post of the Xpress AI and Agents Advent Calendar 2024 series. This series of blog posts highlights various parts of the Xpress AI ecosystem and community. Feel free to claim an empty date and write something to help the community.
In our previous post, we introduced AI Agents and discussed how they need three key elements to be effective: Actions, memory and a loop to perceive, act, and reflect. In today’s post we’ll build a simple but practical agent in the Xpress AI Agent Platform and show how it is used. If you haven’t read that post yet, give it a quick look to get a quick overview about agents and the history.
Getting started
Most tutorials about AI agents make a fundamental mistake, they treat agents like any other software. An Agent works best when it’s deployed as a general solution on top of its tools, instead of a task specific solution. You should think of your agents as problem solvers that can use whatever tools they have access to. It comes down to what they are connected to.
Today, we’ll create a simple but powerful agent by giving it access to a few basic tools, it won’t be very capable or all that useful, but it lays the foundation for tomorrow’s post where we’ll extend it with even more tools to make something really special.
In Xpress AI your agents are just limited to a chat interface, you can make an agent that you interact with solely via e-mail, or via Github issues. In this tutorial though we will create an agent we can chat with ChatGPT style. For that we can use the “Converse” components that are built into the platform. These components allow you to interact with your agent using the same API that OpenAI provides for its models. This means that if you are a developer, you can prototype the front-end with just the OpenAI client library, and then switch the base_url configuration to point to your agent in Xpress AI. You don’t have to be a developer to use your agent though, we have a Chat GUI built in as well.
Step 1: A chatbot “Hello world”
Instead of starting off with one of our working templates, let’s start from scratch and build up to an agent in steps. First, let’s make a kind of hello world by making a chatbot that just responds with what we said. An “Echobot”. Doing it from scratch should give you a real good understanding of all the features we have, and how to interact with Xircuits files.
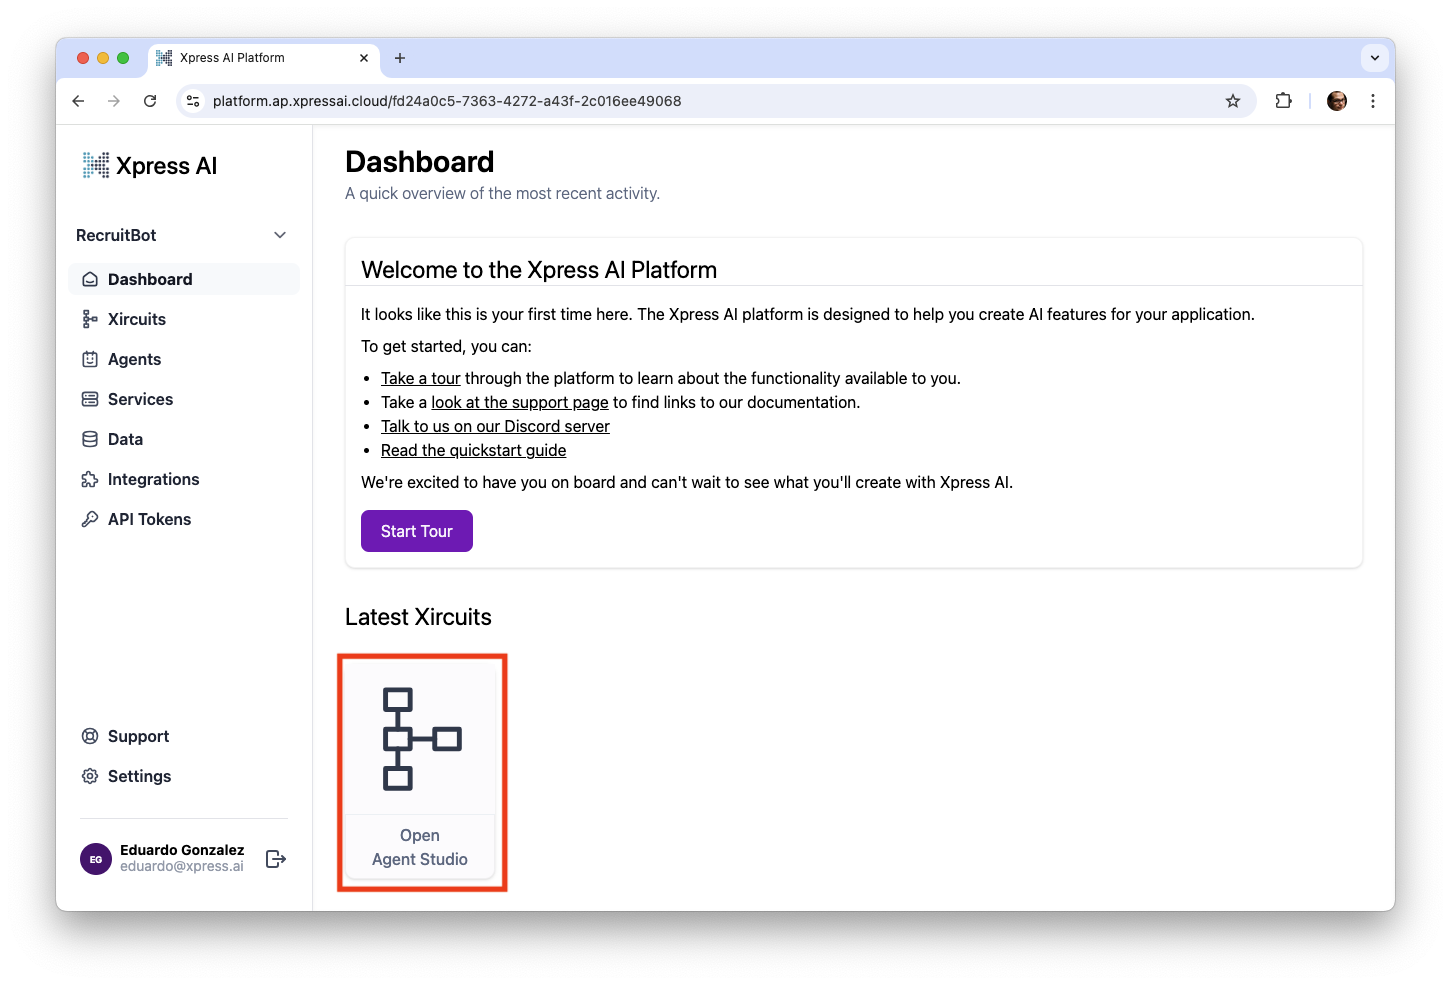
When you first open Xpress AI you’ll be greeted with a tutorial. After finishing (or skipping) it, click the “Open Agent Studio” button to get into the JupyterLab based IDE we provide to get started.
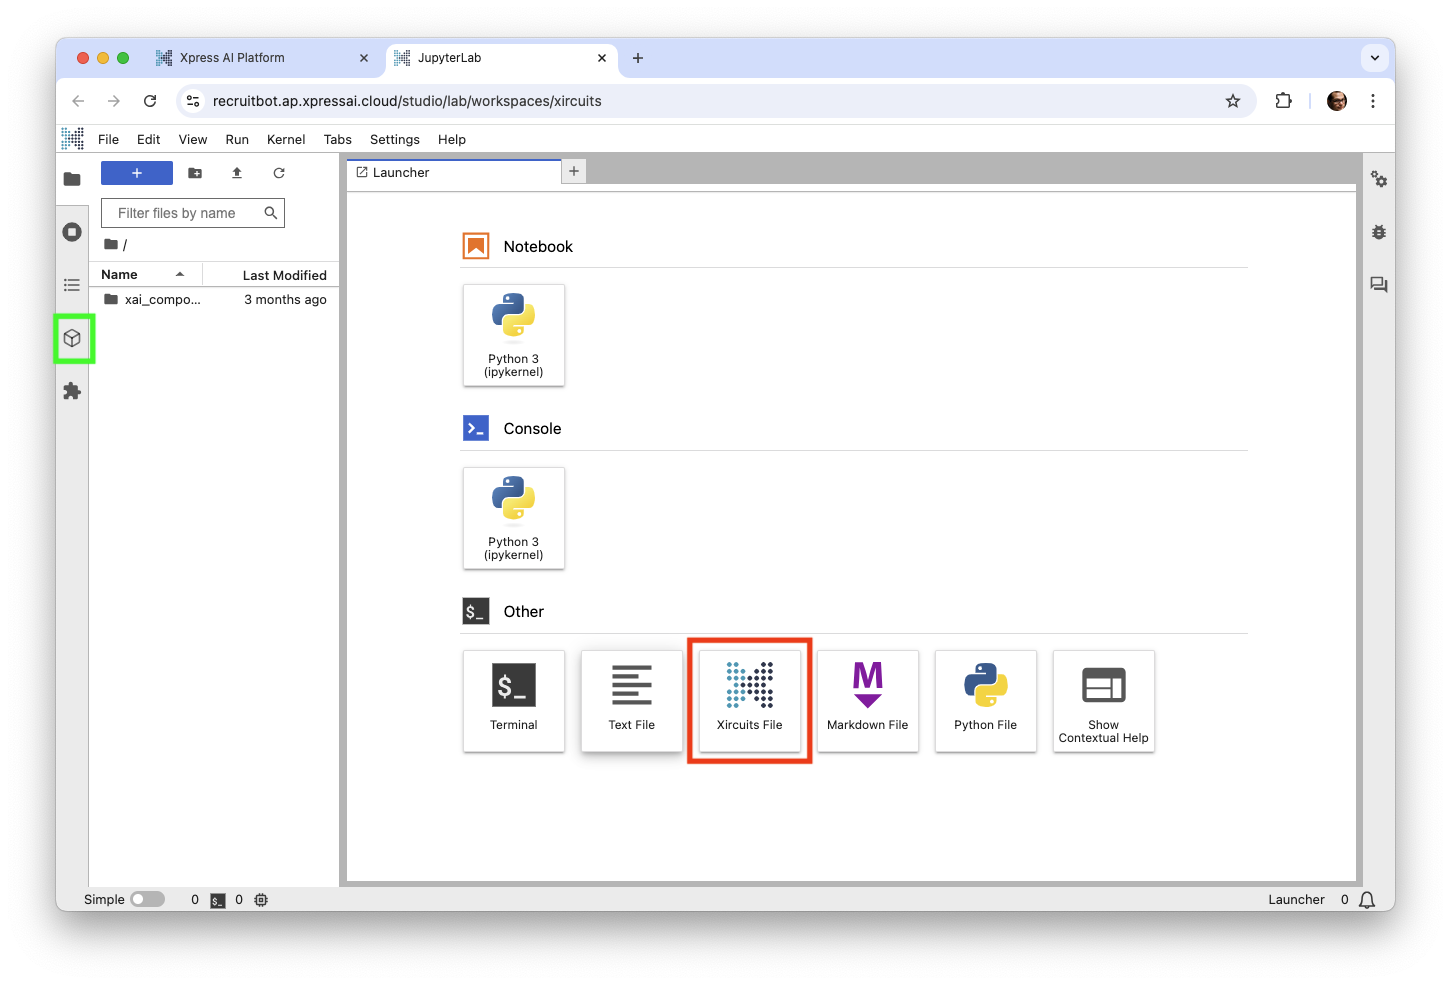
After a few seconds, you should see the following screen. It is a full on JuptyerLab IDE so you’ll never be limited in what you can do to get your agent up and running. Use the “Xircuits File” button (in red below) to create a new Xircuits file and open up the component library tray (in green) to get started.
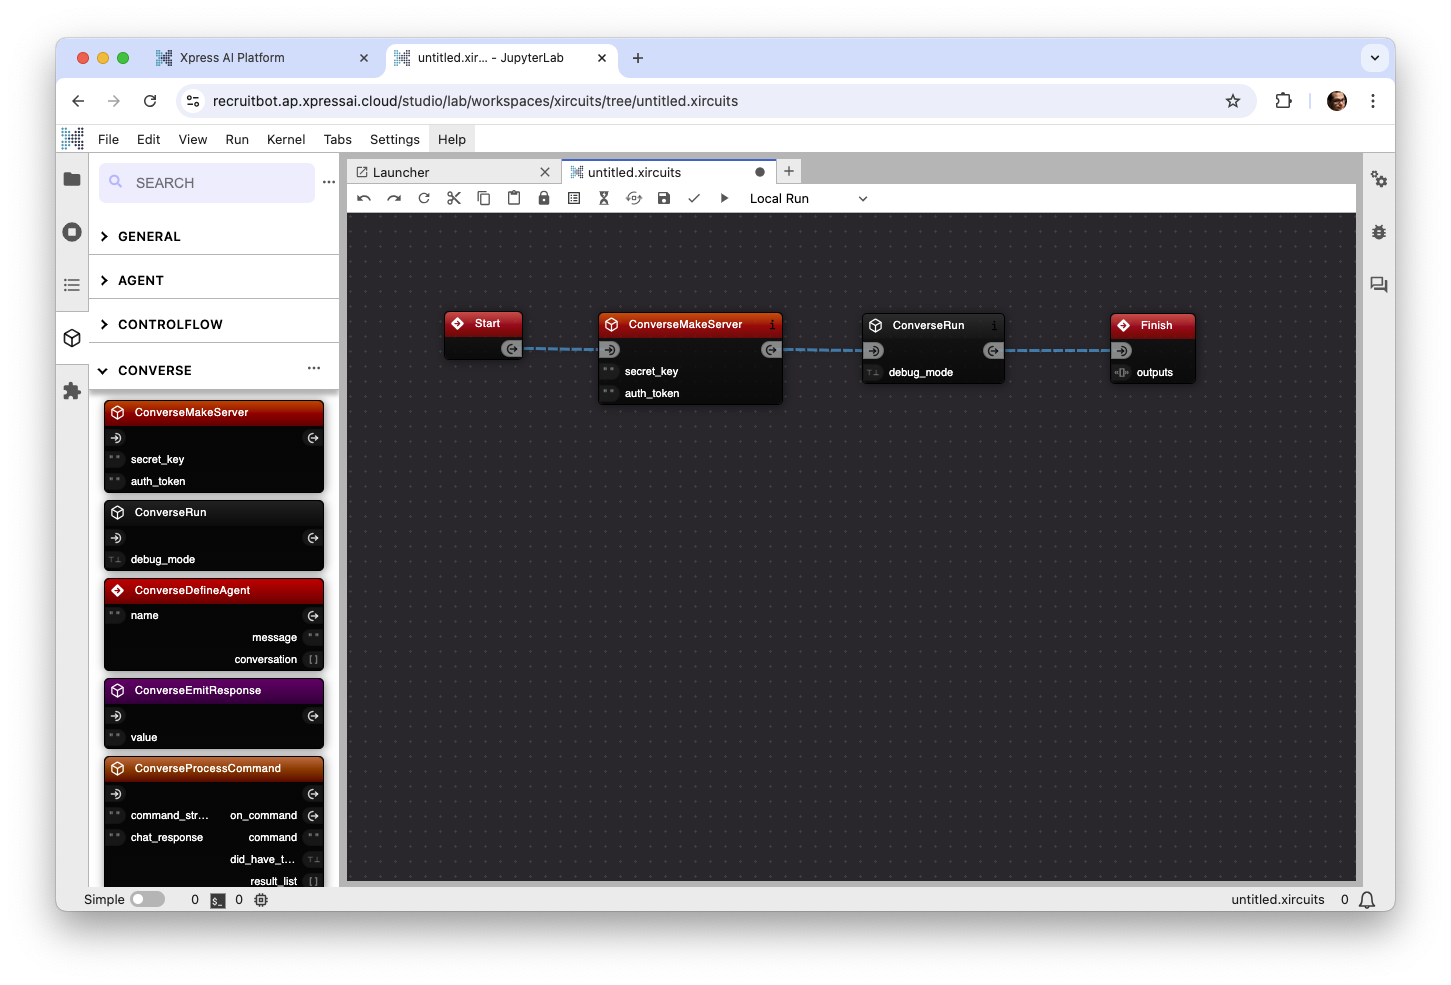
Now you can see the Xircuits visual programming interface. Let’s start by implementing a “no-AI” agent. It’ll just echo what we send but with a few exclamation points added at the end. Open up the Converse component library and drag a ConverseMakeServer and ConverseRun component into the canvas and connect the arrows from the Start to the Finish node. These arrow ports represent the flow of execution. The ports below them are input ports (on the left) and output ports (on the right.) It should look like this:
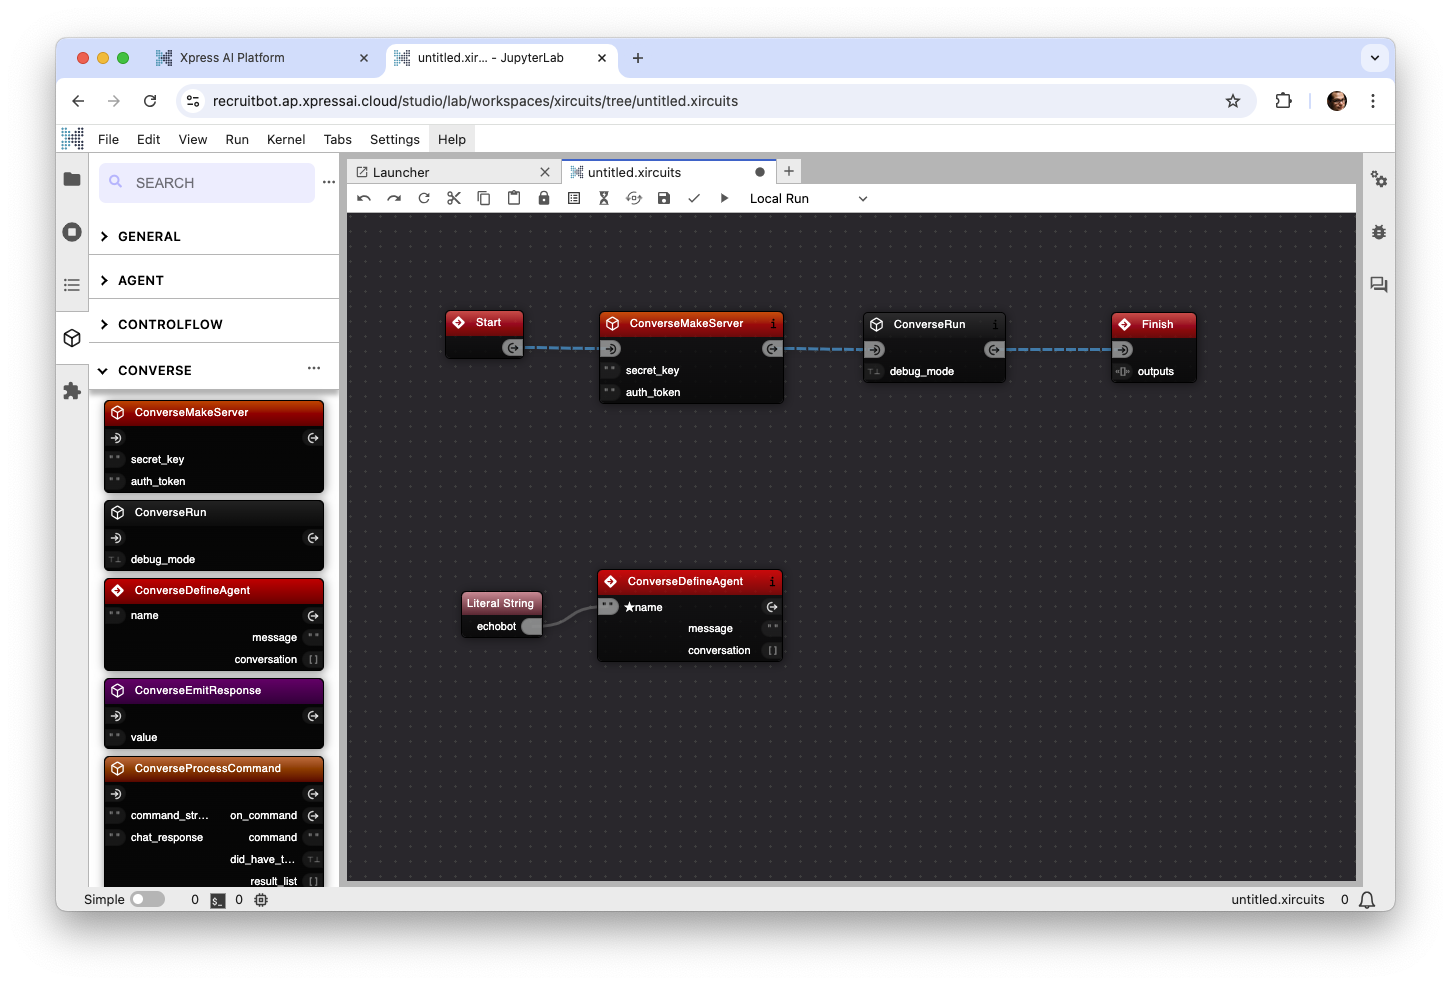
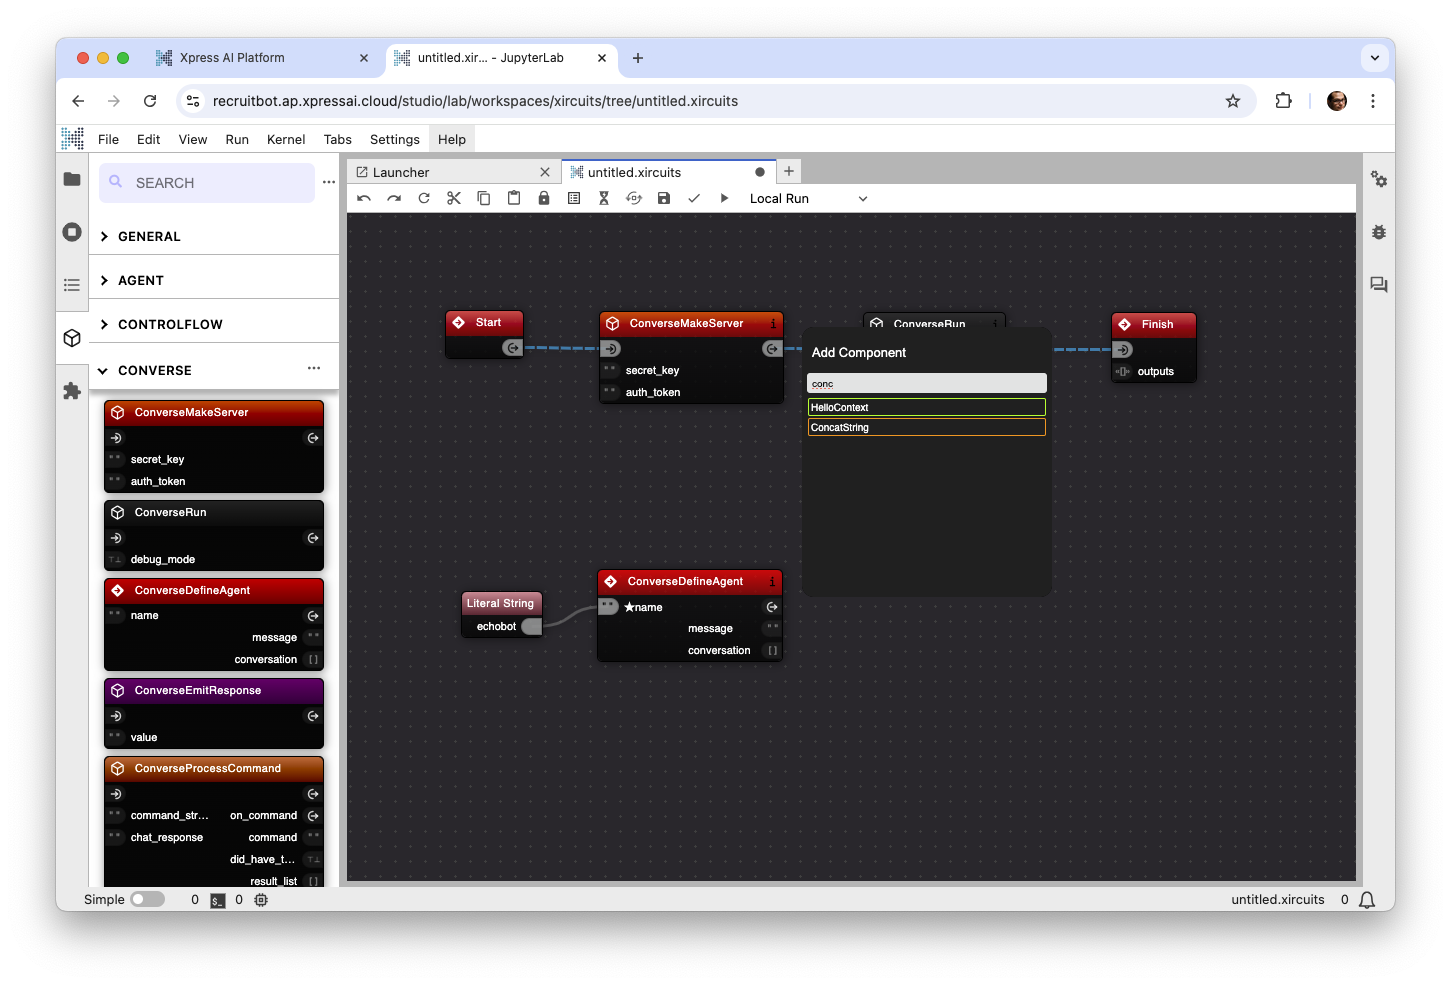
Now we need to define an agent to interact with. Drag a ConverseDefineAgent onto the canvas. This is an event node type, and doesn’t have an input arrow. You can drag it anywhere into the canvas. ConverseDefineAgent requires a name, so drag from the double quotes into anywhere on the canvas and let go to pop up a string literal dialog. Let’s call this agent “echobot”. Your canvas should now look like:
Now drag from the right arrow of the ConverseDefineAgent component and let go to pop up a component search box. Search for ConcatString and click it to add it into the canvas.
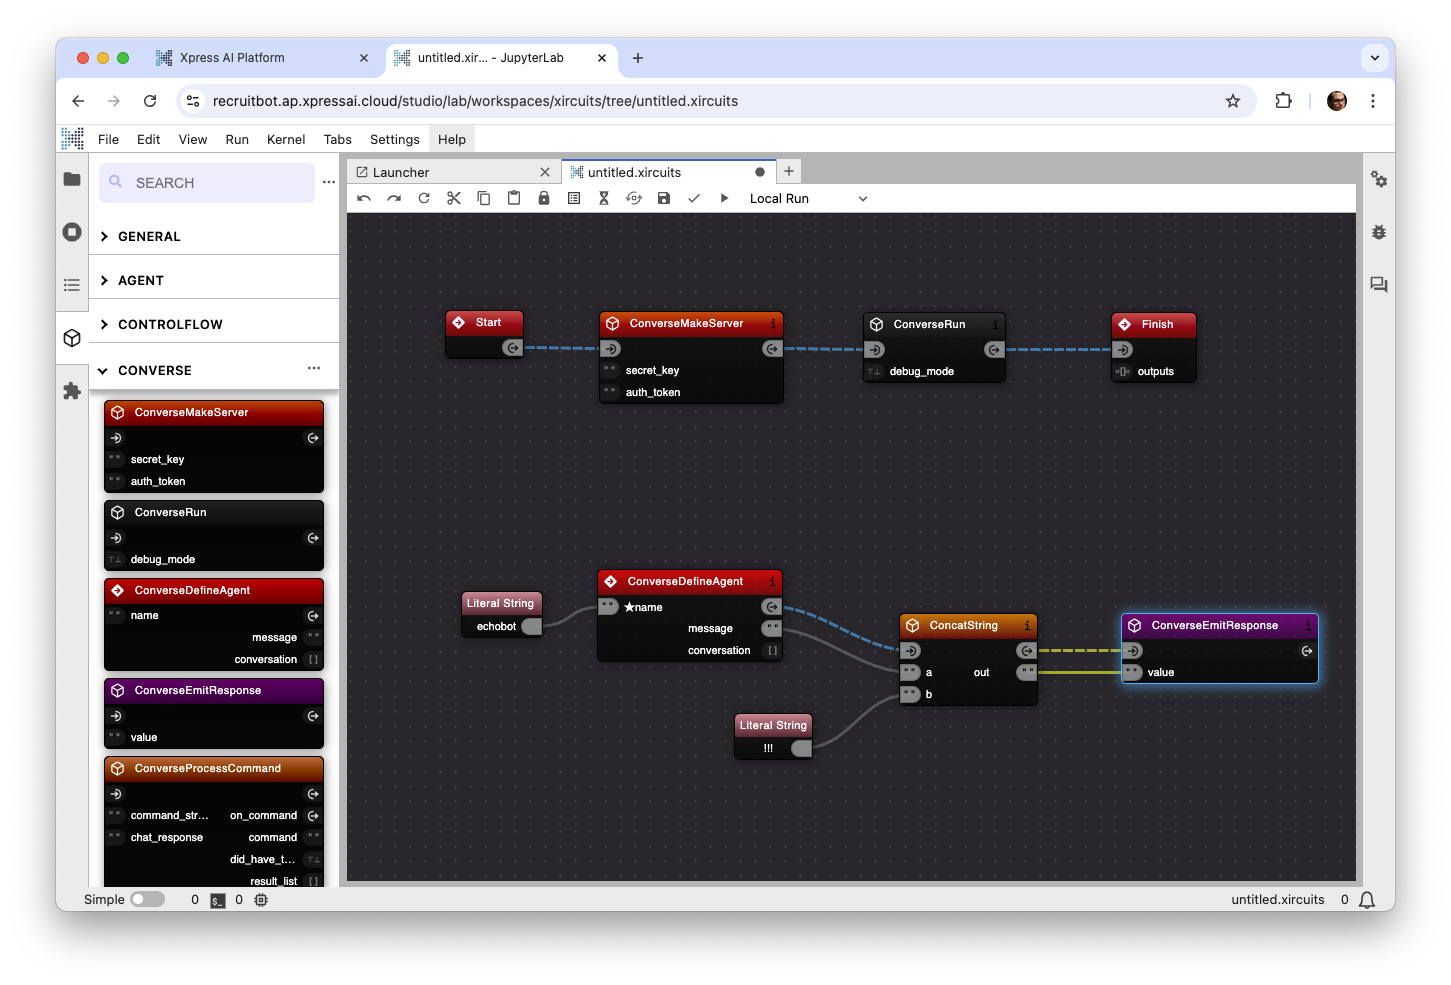
Now connect the “message” port of the DefineAgent to the “a” port of ConcatString, and then create a literal “!!!” string (you can drag from the b port onto the canvas to create a new literal string or drag one in from the general section of the component library sidebar. And finally Add a ConverseEmitResponse component to the canvas and connect the ConcatString arrow port and out port to it. This has everything we need to interact with it, and it should look like the following:
Save the Xircuits file as EchoBot.xircuits with Control-Shift-S or from the Save Xircuits As menu item in the File menu and switch back to the Xpress AI Platform tab.
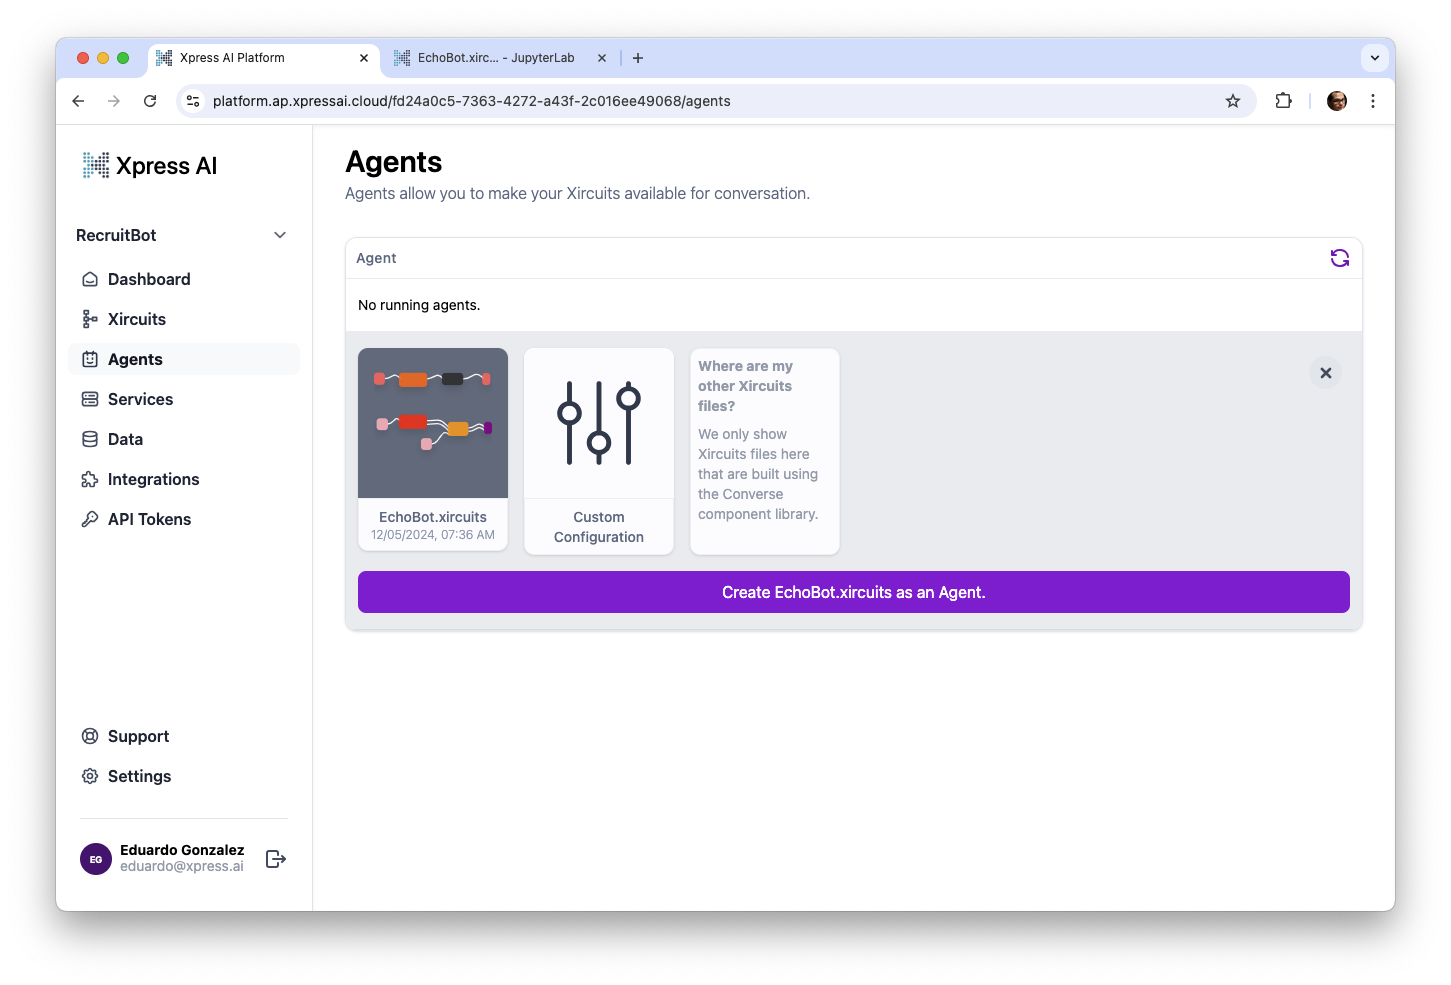
And click on “Create EchoBot.xircuts” as an Agent to start it up.
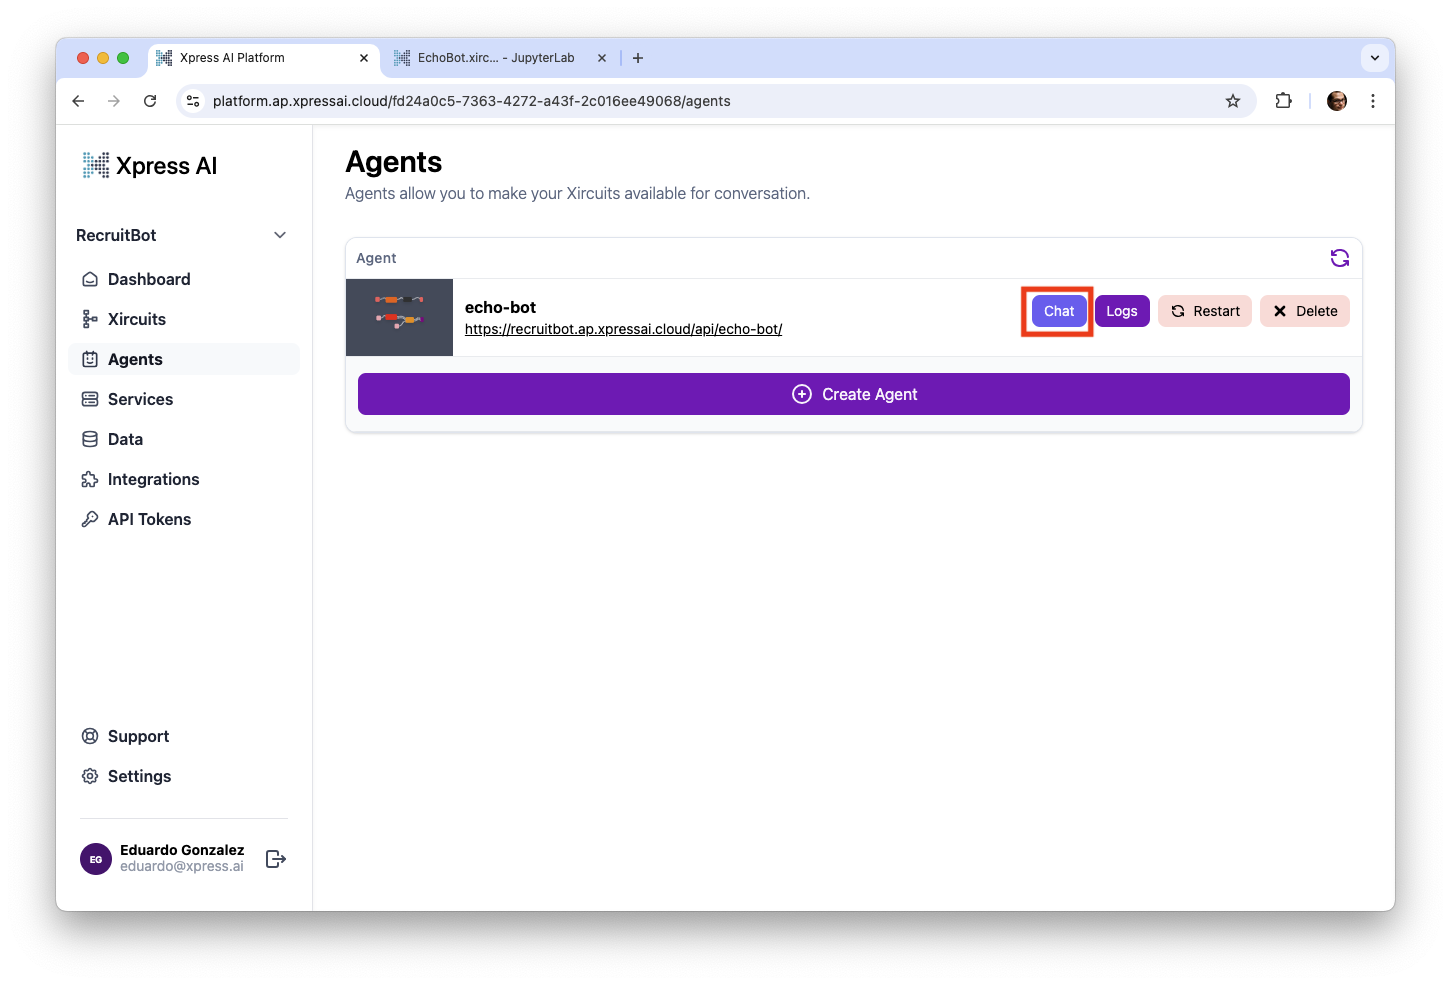
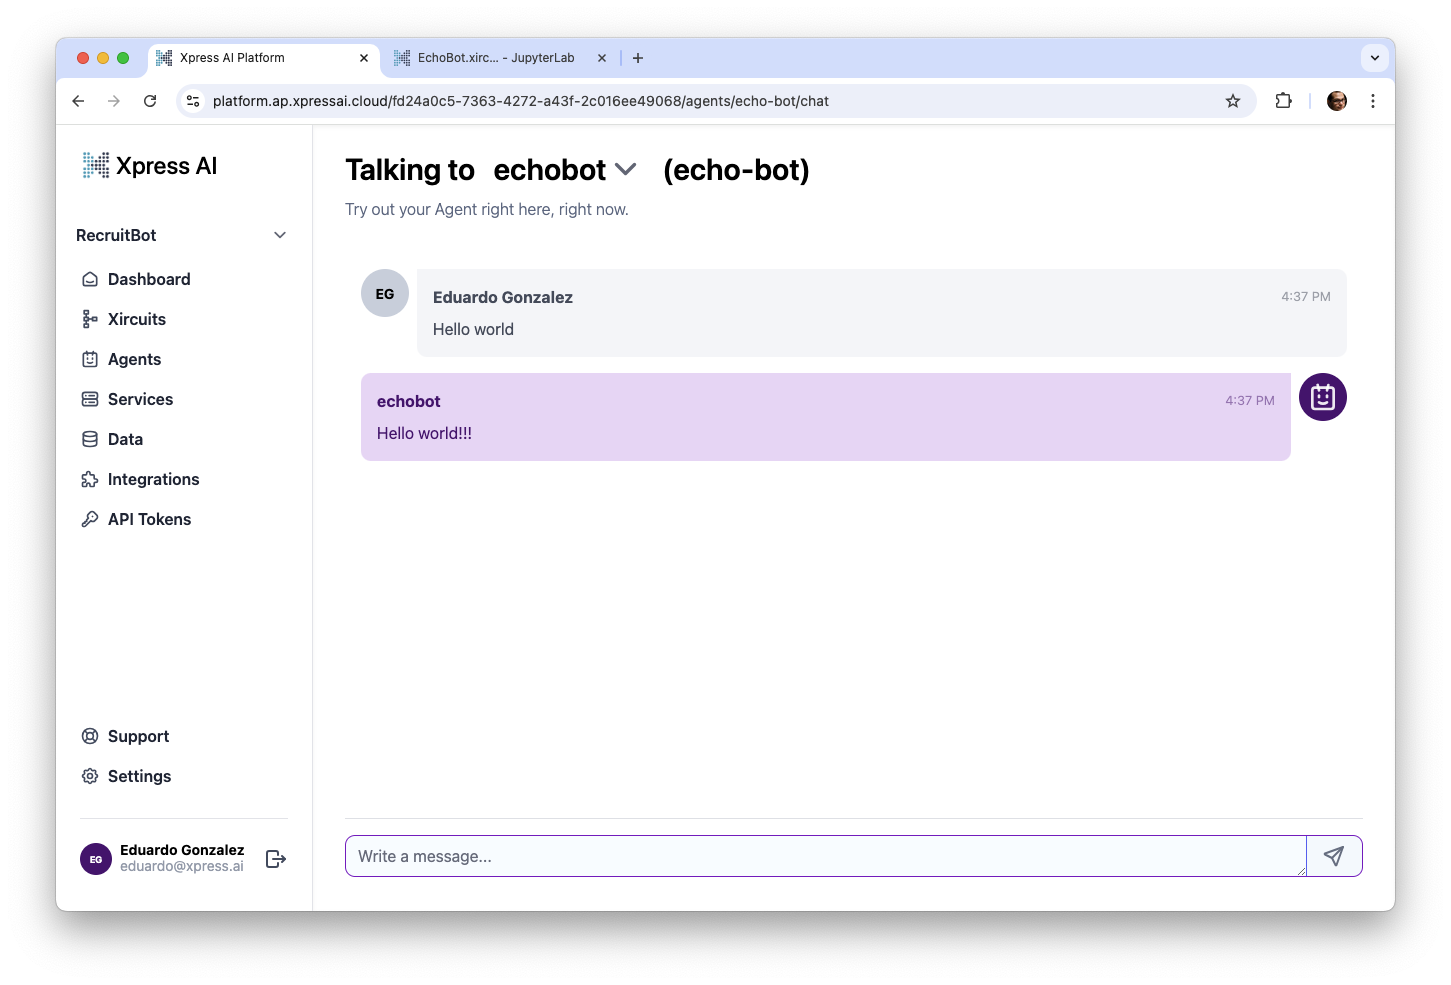
Once it’s up and running, you can click the chat tab to open it up and send a simple Hello world message to which it should immediately respond with a more exciting version.
Step 2: Add some AI
Now let’s make it into an actual agent. Go back to the Agent Studio and open up the Agent Component Library. It has a few other components that we will want to use to create an agent. Grab an AgentNumpyMemory, AgentMakeToolbelt, and AgentInit and drag them onto the canvas. Click on the blue flow of execution line between the ConverseMakeServer and ConverseRun components and hit the delete key to remove it, and wire up AgentMakeToolbelt, AgentNumpyMemory and AgentInt and connect them between ConverseMakeServer and ConverseRun. Finally, click on the ConcatString and hit the delete key to remove it, and drag in an AgentRun component and wire it up between the ConverseDefineAgent and ConverseEmitResponse. Your canvas should now look like this:
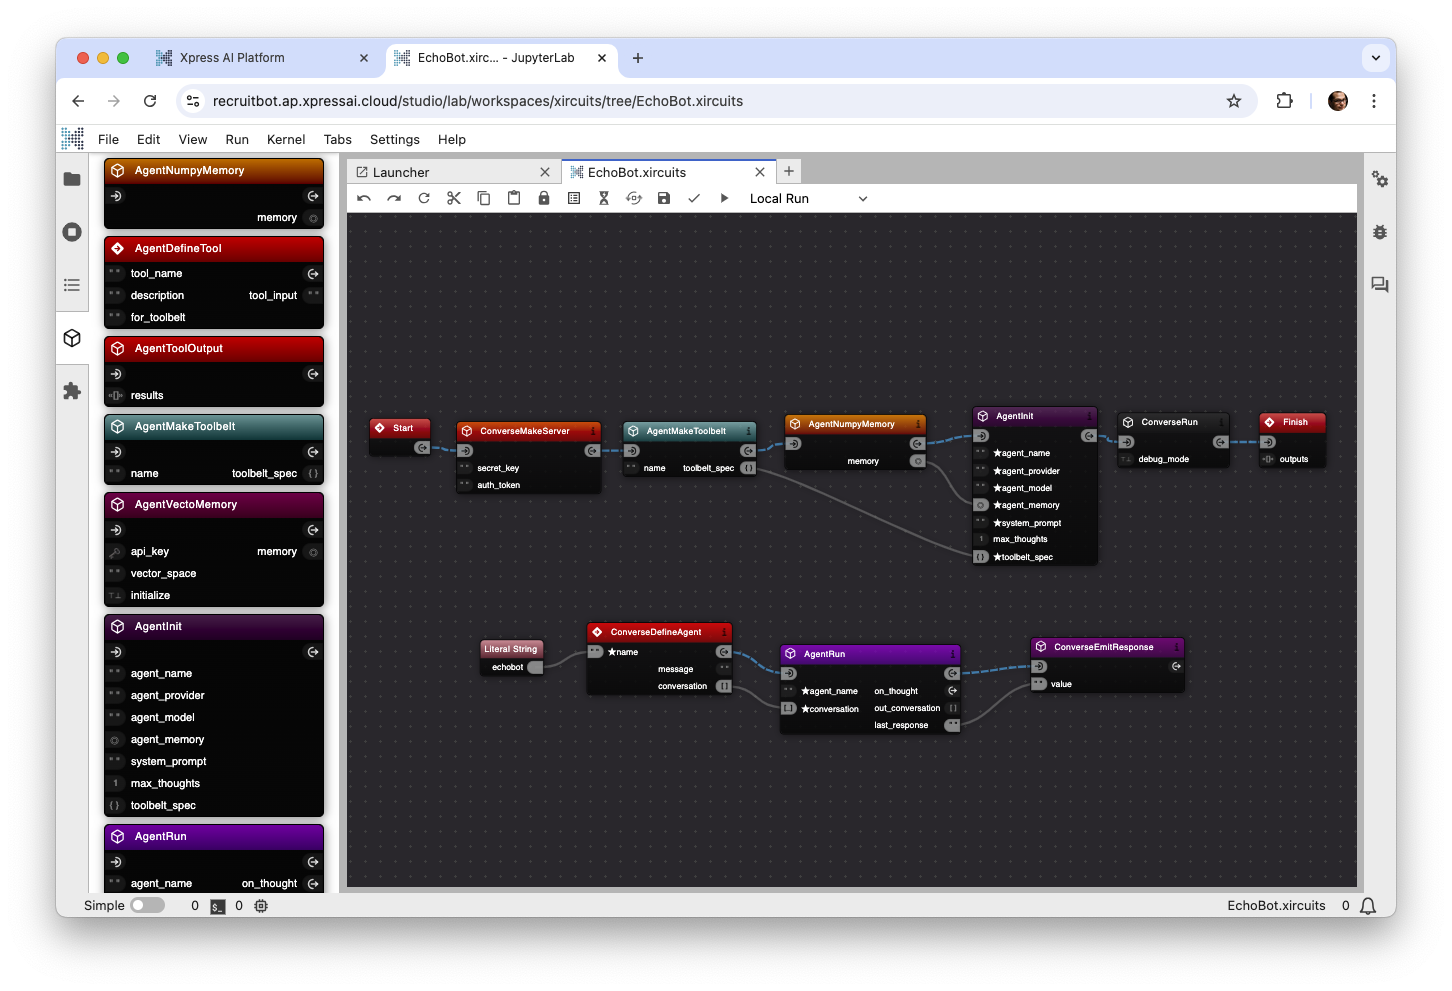
Now we just need to specify the configuration and prompts to the agent. On AgentInit drag from the double quotes and onto the canvas for each of the parameters and set them as follows:
- Set agent_name to agent1 on both AgentInt and AgentRun
- Set agent_provider to xpressai
- Set agent_model to gpt-4o-mini
- Set the max_thoughts to 10. That’s how many tools it can call before it must respond.
- Set the system_prompt to the following:
You are a helpful assistant called agent1.  Use the tools available to you to help the user.
{tool_instruction}
{tools}
Step 3: Adding some tools
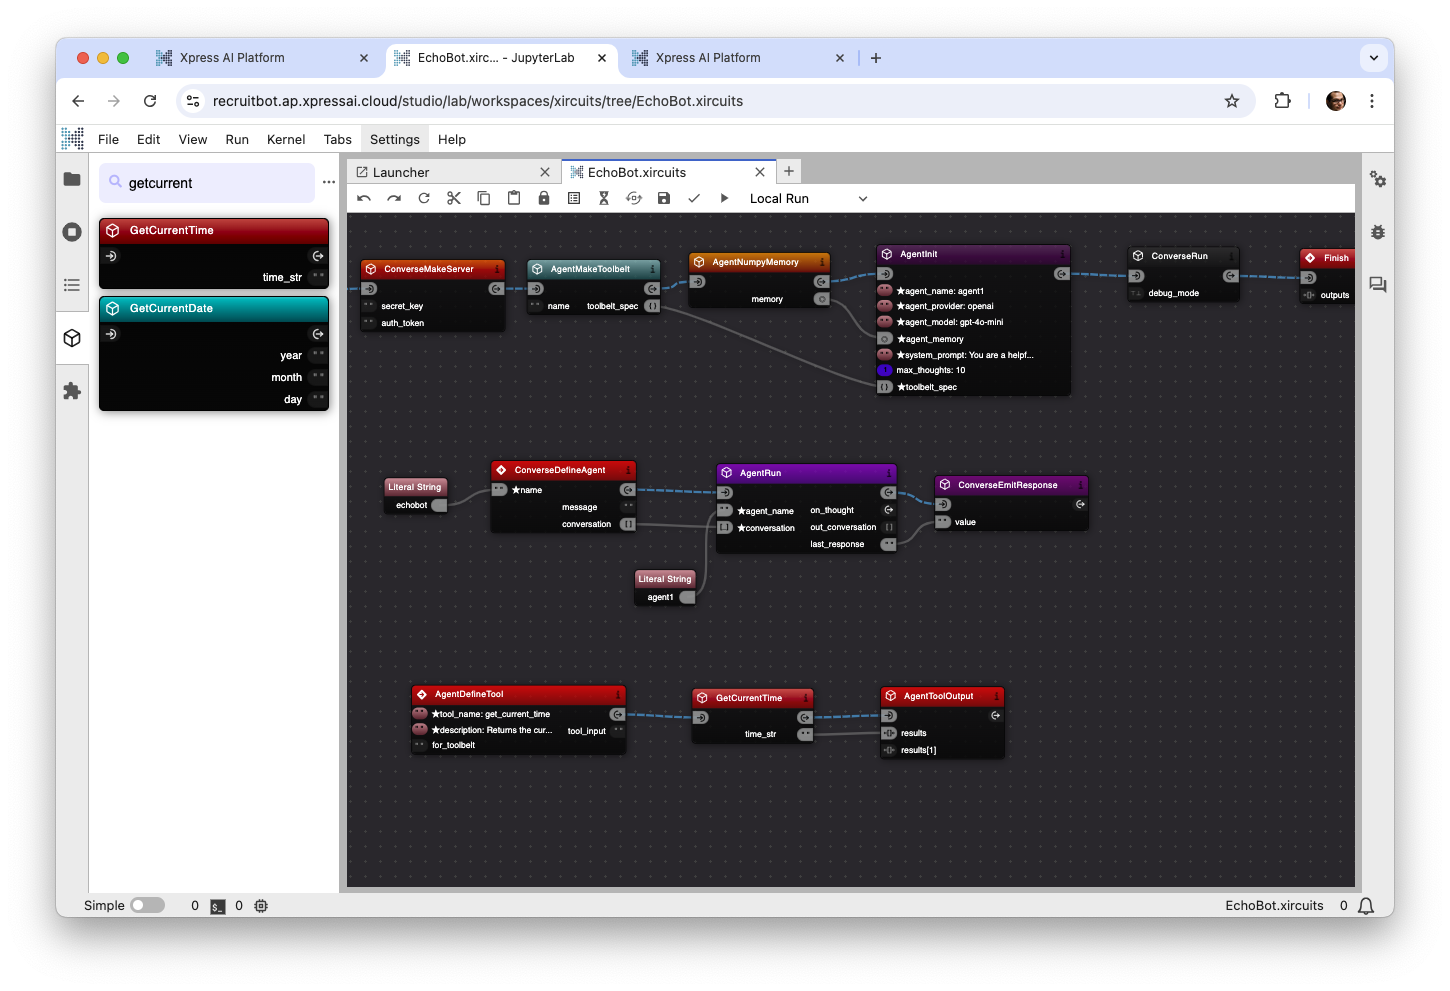
Now we have a chatbot, but to really be an Agent it needs tools. One interesting failing of ChatGPT is that it doesn’t know what time it is. So let’s give it the ability to look at a watch. From the component sidebar, drag an AgentDefineTool and an AgentToolOutput onto the canvas. AgentDefineTool is another Event type of component so you can place it anywhere. These components allow you to add any kind of logic you want as a tool. In here let’s use GetCurrentTime, search for the component in the component side bar and drag it into between AgentDefineTool and AgentTool Output, wire it up to the flow of execution and set the time_str output into the AgentToolOutput’s results input. Now just set the tool_name to “get_current_time” and the description to “Returns the current and and time in standard ISO format.”. If all the string literals are getting a little messy, right click on a component and select “attach literals” to clean it up. Your canvas should now look like this:
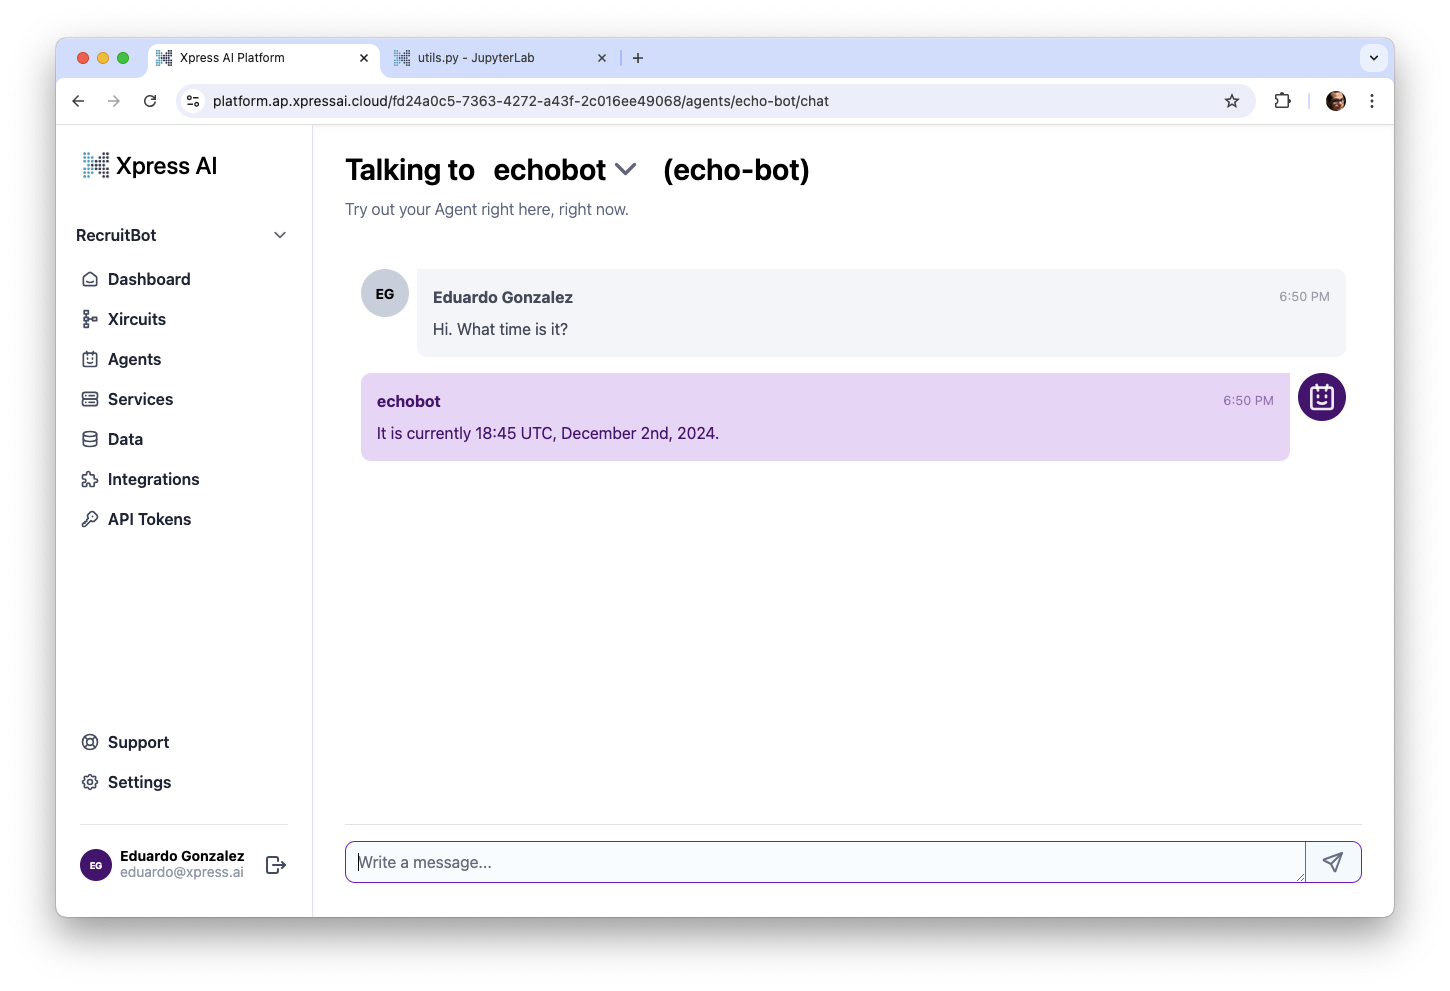
Now switch back to the platform and click the restart button to load the agent with this new configuration and then chat with it to see if it can tell you the time!
Next steps
While this might not be the most exciting agent you have ever seen. It is just a foundation for a much more capable agent. Stay tuned for the post tomorrow, we’ll show how to add more tools and see how the agent can handle more complex requests by itself.
