
Today I would like to share something about the robot simulation software that Shuwai and I are working on: Webots. You may download webots from here
Webots is a robot simulation software that is widely used in industry, education, research. It is a proprietary licensed software before the release of R2019a version, then the good news is it is released under free and open-source Apache 2 license. Webots provides a complete development environment to model, program and simulate robots. Webots includes a set of sensors and actuators frequently used in robotic experiments, e.g. lidars, radars, proximity sensors, light sensors, touch sensors, GPS, accelerometers, cameras, emitters and receivers, servo motors (rotational & linear), position and force sensor, LEDs, grippers, gyros, compass, IMU, etc. The robot controller programs can be written outside of Webots in C, C++, Python, ROS, Java and MATLAB using a simple API.
Webots offers the possibility to take screenshots and record simulations movies. Webots worlds are stored in cross-platform .wbt files which format is based on the VRML language. It is also possible to import and export Webots worlds or objects in the VRML format. Users can interact with a running simulation at any time, i.e., it is possible to move the robots and other object with the mouse while the simulation is running. Webots can stream a simulation on web browsers using WebGL.
System requirements
The following hardware is required to run Webots:
- A fairly recent PC or Mac computer with at least a 2 GHz dual core CPU clock speed and 2 GB of RAM is a minimum requirement. A quad-core CPU is however recommended.
- An NVIDIA or AMD OpenGL (minimum version 3.3) capable graphics adapter with at least 512 MB of RAM is required. We do not recommend any other graphics adapters, including Intel graphics adapters, as they often lack a good OpenGL support which may cause 3D rendering problems and application crashes. Nevertheless, in some cases, the installation of the latest Intel graphics driver can fix such problems and let you use Webots. However, we don’t provide any guarantee on this. For Linux systems, we recommend only NVIDIA graphics cards. Webots works well on all the graphics cards included in fairly recent Apple computers.
The following operating systems are supported:
- Linux: Webots is ensured to run on the latest Ubuntu Long Term Support (LTS) release, currently version 20.04. But it is also known to run on most recent major Linux distributions, including RedHat, Mandrake, Debian, Gentoo, Arch, SuSE, and Slackware. We recommend using a recent version of Linux. Webots is provided for Linux 64 (x86-64) systems. Webots doesn’t run on Ubuntu versions earlier than 16.04.
- Windows: Webots runs on Windows 10 and Windows 8.1 (64-bit versions only).
- Mac: Webots runs on macOS 10.15 “Catalina” and 10.14 “Mojave”.
Webots may work but is not officially supported on earlier versions of the above mentioned operating systems.
Other versions of Webots for other UNIX systems may be available upon request.
Webots officially supports only recent NVIDIA and AMD graphics adapters. So it is recommended to run Webots on computers equipped with such graphics adapters and up-to-date drivers provided by the card manufacturer (i.e., NVIDIA or AMD). Such drivers are often bundled with the operating system (Windows, Linux and Mac OS X).
Upgrading Your Graphics Driver
On Linux and Windows, you should make sure that the latest graphics driver is installed. On the Mac, the latest graphics drivers are automatically installed by the Software Update, so Mac users are not concerned by this section. Note that Webots can run up to 10x slower without the appropriate driver. Updating your driver may also solve various problems, i.e., odd graphics rendering or Webots crashes. Since I am a window user, so I will focus on the window os. The guide for linux os can be obtained from here.
Upgrading the GPU Driver on Windows
- Right-click on My Computer.
- Select Properties.
- Click on the Device Manager tab.
- Click on the plus sign to the left of Display adapters. The name of the driver appears. Make a note of it.
- Go to the website of your card manufacturer: http://www.nvidia.com for an NVIDIA card or http://www.amd.com for a AMD graphics card.
- Download the driver corresponding to your graphics card.
- Follow the instructions from the manufacturer to install the driver.
Webots Simulation
A Webots simulation is composed of following items:
- A Webots world file (.wbt) that defines one or several robots and their environment. The .wbt file does sometimes depend on external PROTO files (.proto) and textures.
- One or several controller programs for the above robots (in C/C++/Java/Python/MATLAB).
- An optional physics plugin that can be used to modify Webots regular physics behavior (in C/C++).
What is a World?
A world, in Webots, is a 3D description of the properties of robots and of their environment. It contains a description of every object: position, orientation, geometry, appearance (like color or brightness), physical properties, type of object, etc. Worlds are organized as hierarchical structures where objects can contain other objects (like in VRML97). For example, a robot can contain two wheels, a distance sensor and a joint which itself contains a camera, etc. A world file doesn’t contain the controller code of the robots; it only specifies the name of the controller that is required for each robot. Worlds are saved in “.wbt” files. The “.wbt” files are stored in the “worlds” subdirectory of each Webots project. The image shown here is an example of world file from top view in the sample world: factory.

What Is a Controller?
A controller is a computer program that controls a robot specified in a world file. Controllers can be written in any of the programming languages supported by Webots: C, C++, Java, Python or MATLAB. When a simulation starts, Webots launches the specified controllers, each as a separate process, and it associates the controller processes with the simulated robots. Note that several robots can use the same controller code, however a distinct process will be launched for each robot.
Some programming languages need to be compiled (C and C++) other languages need to be interpreted (Python and MATLAB) and some need to be both compiled and interpreted (Java). For example, C and C++ controllers are compiled to platform-dependent binary executables (for example “.exe” under Windows). Python and MATLAB controllers are interpreted by the corresponding run-time systems (which must be installed). Java controller need to be compiled to byte code (“.class” files or “.jar”) and then interpreted by a Java Virtual Machine.
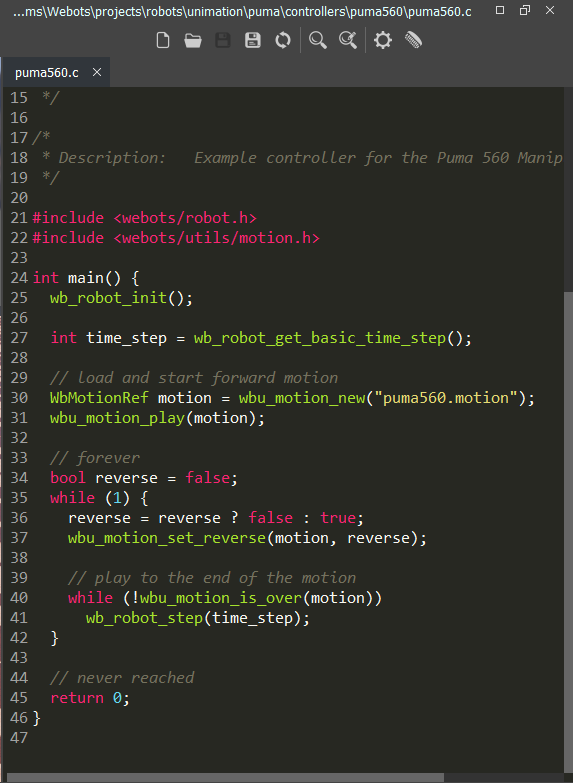
The source files and binary files of each controller are stored together in a controller directory. A controller directory is placed in the “controllers” subdirectory of each Webots project. The controller text editor of webots will appear on the right side when you launch the webots program. The screenshot shows the puma 560 (robot) example controller in C language.
What is a Supervisor Controller?
The Supervisor controller is the controller of a Robot whose supervisor field is set to TRUE, it can execute operations that can normally only be carried out by a human operator and not by a real robot. The Supervisor controller can be written in any of the above mentioned programming languages. However, in contrast with a regular Robot controller, the Supervisor controller will have access to privileged operations. The privileged operations include simulation control, for example, moving the robots to a random position, making a video capture of the simulation, etc.
Sample Webots Applications
This chapter gives an overview of sample worlds provided with the Webots package. The example worlds can be tested easily; the “.wbt” files are located in various “worlds” directories of the ”WEBOTS_HOME/projects” directory and can be directly opened from Webots using the Open Sample World item in File menu. The controller code is located in the corresponding “controllers” directory. This chapter provides only a short abstract for each example. More detailed explanations can be found in the source code. Below is the list of sample projects by webots which is very interesting to play with.
Sections
Tutorials
Webots provide tutorials to start up a project too. The tutorials provided by webots is definitely sufficient to build a mini robot from scratch. If you are tired of reading, there is a youtube playlist that show a better visualisation for every single step that you have to know to start with your customized project. You are refer to here for the video playlist. Although the content is slightly different, but I personally think it is good to read and watch the video to know what is happening.
Sections
- Tutorial 1: Your first Simulation in Webots (30 minutes)
- Tutorial 2: Modification of the Environment (30 minutes)
- Tutorial 3: Appearance (20 minutes)
- Tutorial 4: More about Controllers (30 minutes)
- Tutorial 5: Compound Solid and Physics Attributes (15 minutes)
- Tutorial 6: 4-Wheels Robot (60 minutes)
- Tutorial 7: Your First PROTO (20 minutes)
- Tutorial 8: Using ROS (60 minutes)
- Going Further
Well, now you can start to play with it. Hope you have a wonderful experience. Enjoy!
Notes!
if you are coding using C++ or C, make sure you remember to build/compile the code for you to able to see the changes you made. There are sometime bug in webots where you couldn’t see it after you compiled, all you have to do is just restart webots.
Reference